
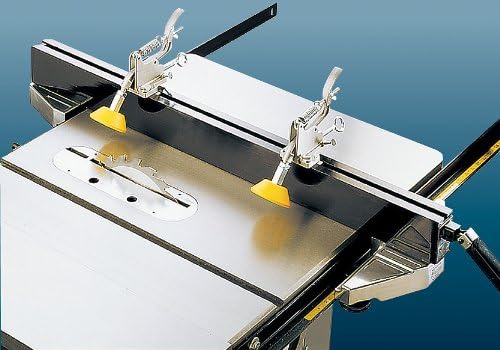
 When it comes to the issue of safety, the table saw fence is the most important part of the table saw. The table saw fence is also known as “rip fence”. You should make and install a table saw fence parallel to the blade for getting the highest accuracy and precision in ripping. The fence will also save you from kickback and racking incidents.
Now we come to the main point- how to make a table saw fence. You will get the complete but simplest process of building a table saw fence from this article. Many renowned saw models include ready rip fence. But most of the inexpensive models will not offer you a ready table saw fence.
Don’t worry, you can make your table saw fence if you don’t have one. And it’s a very easy task to DIY a new table saw fence or improving the old one.
Why Should You Use a Table Saw Fence?
Before you go to make a fence, you should have a clear idea about the importance of the table saw fence. We are providing a short idea about it.
1. Improving Accuracy
The rip fence will upgrade the accuracy of ripping and offer straight cutting. It’s especially important for the newbies as a straight cutting guide. The new woodworkers should use a rip fence as a cutting guide to achieving precision and accuracy in rip cutting.
2. Ensuring Safety
Working with a table saw without any fence will imply you to guide the wood with your hands. This is risky as it increases the chance of hurting the hands and kickback accidents. Using a rip fence can secure your workplace and decrease the chance of getting hurt.
In many woodworking shops, racking or kickback while ripping causes serious injuries. So, we will encourage you to use a rip fence with your table saw.
How to Make a Table Saw Fence – 7 Easy Steps

It’s the best idea to utilize the spare things of your workshop to make the table saw fence. And you will need nothing more than a few wood pieces and hardware. The making process is very easy to get done by anyone. There are only 7 simple steps to follow to make a complete table saw fence.
Step 1: Gather All the Necessary Tools
You will need a few things to DIY the table saw fence plans. We are providing a list of all necessary items here; you should arrange them all before starting the fence building.
List of Necessary Tools
- A Tape measure
- A Jigsaw
- Screw-threaded rod with nut
- 4 piece Wood screws-(3″ deck screws)
- 2×4 (longer than the depth of your table saw)- 1 pc
Step 2: Measure the Table Dimension
You must measure all the dimensions of the table saw fence correctly. Take the tape measure and measure the length of the table of the saw. Measure from the front of the table to the rear, using the tape measure.
Generally, the tables of table saws are 24″ to 36″ long. So the minimum length of the 2×4 should match with this length.
Step 3: Prepare End Caps for the Rip Fence
Now you have to attach the 2×4 with the two ends of the fence. For this purpose, you have to cut the two end caps using the jigsaw. Each end cap should be 3″ long.
Step 4: Make the 2×4 As Long As the Table
Now cut the 2×4 using a jigsaw and make it as long as the table. This cut should be perfectly measured as a small error can spoil the whole attempt! You can use a square mark to mark the measurement accurately.
Step 5: Attach the End Caps with the 2×4
Take the 2×4 that you have cut down to the same length as the table. Now attach the end caps at both ends of the 2×4. Use the -inch deck screws for this attachment.
First, drill the pilot holes on the 2×4 at minimum 3 inches depth and then screw the deck screw into it. Keep in mind that the diameter of these holes will be a bit smaller than the deck screws.
Step 6: Check the Fitting of the Fence Over the Saw Table
Place your newly created 2×4 fence onto the table of the saw. You will be able to see the perfection of your measurements. It will be visible how accurately you have taken the measurements and how appropriately made the cuts! Keep a gap of minimum 1 inch at one end of your fence.
Step 7: Tightly Screw the Fence
Now take the threaded screw or rod (which you already have) and install it into the one end cap of the fence. This threaded screw will secure the table saw fence with the table.
At one end of the 2×4 fence, drill a pilot hole into a cap. Before drilling, you should take measurements by placing the fence on the table. The threaded screw or rod should pass through the end cap keeping in line with the table base.
After drilling, screw the threaded rod through the end cap of the fence. You should add the end piece and the twist nut for the threaded rod. As such you will be able to tighten the fence up by turning this twist nut against the table saw.
You are done with the procedure and have e new table saw fence made by you!
This simple DIY rip fence is a great starter. But if you want the uttermost accuracy, fully clean cutting and 100% safety, you should go for a solid and precise after market table saw fence.
Conclusion
We tried to mention here – how to build a table saw fence. The process is simple and easy to DIY e starting level rip fence. If you are a professional woodworker and you need super-clean cuts with high accuracy, you should try for a good quality table saw fence from a renowned brand. There are many table saw fences available in the market; you can grab the perfect one for you.
You may also interested in these articles:
How to Clean a Table Saw Blade – 5 Easy Steps
10 Must-Have Table Saw Accessories (with Pictures)


Leave A Reply